

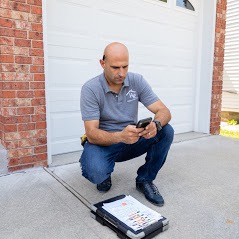
Steve's Painting Process
- Steven Pustylnik
- Apr 5, 2020
- 4 min read
Most remodeling projects end with painting while sometimes we are hired just to paint. Either way, we make sure to follow the same process each time to ensure efficiency and consistency. We do this not just for painting but we follow a process for everything at Ritz Renovation. Here's my 12-step painting process to get the perfect paint job:
(1) SETUP - I always begin by filling up a bucket of soap and water and throwing in a few yellow microfiber rags. Then, I'll open up a black contractor bag and put down rosin paper and drop cloths on the floor and plastic sheeting on furniture and fixtures.
(2) COVERS (OFF) - I take off the electric faceplates which I call "covers" and store them in one place along with everything else that will be reattached later like the doorknobs, curtains, and wall art. When it comes to vent covers I make a judgment call because they tend to damage the walls when taking them off and can be difficult to reattach afterwards. After they are reattached there tends to be rough areas or gaps that need touch-ups. If I think I'm going to have an issue my solution is to leave the covers on, caulk the gaps, and carefully paint the walls around them so there’s no struggle to reattach them later and do touch-ups.
(3) CAULK - Its very important to go around and caulk all the trim work: the doors, casings, baseboard, chair and crown moldings. You'd be surprised how many times I'm the first one caulking some of the trim work and the house isn't new and has been painted several times. When the trim work is not caulked there are gaps and holes and on a good paint job they appear black, jumping out as eye sores! Keep in mind though that even when the trim work has been caulked before I still like to give it a fresh bead. Like most guys, I prefer Alex Fast Dry 20-minute caulk.
(4) SEMI - Using a 2 inch brush and small roller I paint all of the trim work that is getting semi-gloss, usually an ultra white of some sort depending on the brand. Where the trim work meets walls and ceilings I am very liberal with the brush and don't worry about cutting straight lines; that will come later. For now, I make sure all the trim work is well-painted.
(5) PRIME (ONE) - I take out any nails or screws that are not staying and with a joint knife I bang and scrape any damage on the drywall such as nail pops and bad tape lines. Unless the drywall is painted a flat white I typically go over everything quickly with primer. This way any compound used for repairs will bond better. Plus, no matter how good the paint is you will always get a better result if you prime first.
(6) MUD - We all have our own technique to fix drywall but one thing is for certain: using joint compound alone takes forever! Many painters use a fast-drying joint compound that comes in a powder form that simply mixes with water. It comes in 5, 20, 45, and 90 minute formulas. I prefer to use mud, which is made by mixing ordinary premixed joint compound with the green lid, Plaster of Paris, and water. I use a skim coat technique to build up each coat of mud on top of the last, meaning there is NO SANDING until the last coat.
(7) SAND - I hate sanding, don't we all? The good news is that there is very little sanding to do because the skim coat technique doesn't leave much extra compound to sand. It's really just sanding down the outer edges of the patches so the repairs are not obvious when its painted. Then, I'll go around with the vacuum and clean off any dust.
(8) PRIME (TWO) - After sanding the repairs its very important to prime those specific spots or they will show through the paint. It's also good practice to go over everything one more time with the primer at this point. Next, I use a 5000+ lumen LED work light to inspect for any additional repairs, if any, and quickly make those repairs.
(9) CEILINGS - Using a 2" brush and 3/8" nap I cut and roll the ceilings. As a rule of thumb, I always cut first and then roll. In the same fashion as in Step (4) SEMI, I am loose with the brush and not concerned with hitting the walls because I will be painting them later. The trick though is making sure there are no drips left behind as to not require any additional repairs. Remember, the walls are primed at this point and ready for paint.
(10) WALLS - The same rules apply from the last step, I use a 2" brush and 3/8" nap to cut and roll the walls. Here, it's important to cut everything perfectly as the trim work and ceilings are done. There's no more room for loosy-goosy with the brush. Two coats, of course. This is also the time to do any touch-ups on the ceilings, trim work, or walls.
(11) COVERS (ON) - Whatever came down must go back up, or is it the other way around? I put back all the electric faceplates, doorknobs, curtains, and wall art.
(12) CLEAN UP - Now that the painting is done its time to remove the rosin paper, drop cloths, and plastic sheeting. Using the soapy water I clean the floor and check for any dust or paint drops. The trash is taken out and all the equipment and materials are put back in the truck except the mixed paint as I leave that for the client.
That's my 12-step painting process and everyone at Ritz Renovation follows it, which is why our paint jobs are perfect, and part of what makes us the best home improvement contractor on Staten Island. I'm obsessive about my process because its effective and guarantees a perfect paint job every single time. I've obviously put a lot thought into this so I welcome any and all feedback since I'm always looking to improve my process.


Comments